
Want to improve your visitors and get the sales your store deserves? Add wishlist to WooCommerce store now!!
You need to understand that not all costumes are ready to buy their favorites at a go. They take time to make decisions. The feature “Wishlist” can help you in such cases. It will give your users the privilege to save their items and make their purchases in the future.
A Brief:-
A wishlist will help your guests and regular purchasers to remember the products they saved to purchase in the future.
The shoppers will be able to save their favorites onto the wishlists and share them with their family and friends. Wishlists are a great way to improve traffic and brand awareness.
It will give you an idea of which product is mostly loved by people and added to their wishlists. You can run discounts and promotional offers on popular wishlist products to increase sales.
Advantages of implementing WooCommerce in your eCommerce store
Your guests and customers can save their favorites on their wishlist. It will help them to locate the item in the future and purchase it.
- They will turn up to you for special events like the holiday season, weddings, birthdays, and other occasions. For instance, the user can save their gifts in the wishlist and purchase them on special occasions.
- The user will give you their email address to wishlist their items. You can use it for marketing campaigns. These are the ways to generate leads.
- You can use the wishlist to identify the most-liked merchandise in your inventory.
How to add Wishlist to WooCommerce?
Step 1: Installation of the plugin
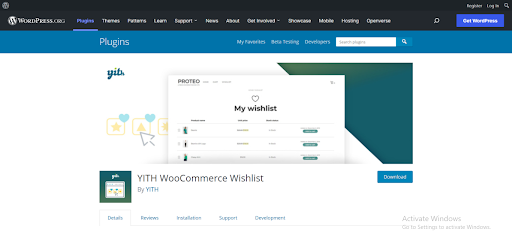
Here we are using the YITH WooCommerce Wishlist plugin for your reference. Choose any plugin that you like.
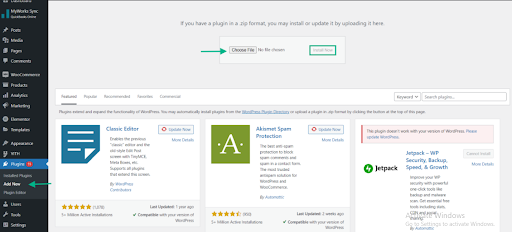
Zip the file and head to WordPress Dashboard to add a wishlist to WooCommerce. Click “Plugins” and “Add New”. In the next step, you need to pick the wishlist for your ZIP file of your WooCommerce. Click “Upload Plugin”.
Press “Activate Plugin” once the installation is over.
Step 2: Accessing the Plugin
Visit “WordPress Dashboard” to do the customization once activated. Then click “YITH” and press “Wishlist” to add wishlist to WooCommerce.
Next, choose “Add to Wishlist Settings”.
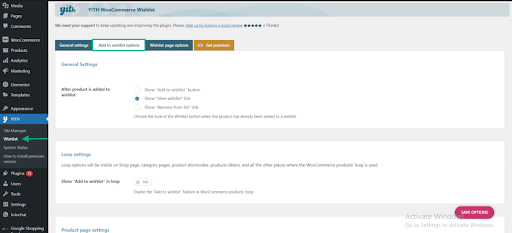
The plugin’s dashboard is easy to use and has a simple interface.
Step 3: Customizing the Plugin Settings
Each item has an automated link- “Add to Wishlist”. You get the upper hand to choose the link which you want to display. For example, you can alter the link to provide the option “Remove from list” or “View wishlist”. This you can use in the place of the tab “Add to wishlist”.
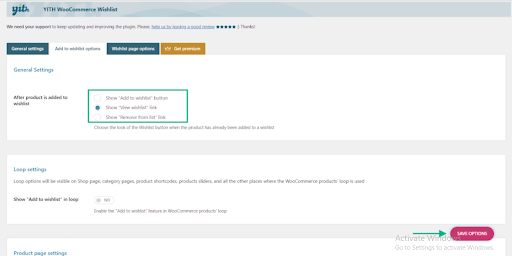
You will see “Product page setting” and “Loop settings” after that. You can specify the location where you need the “Add to wishlist” tab on the product page.
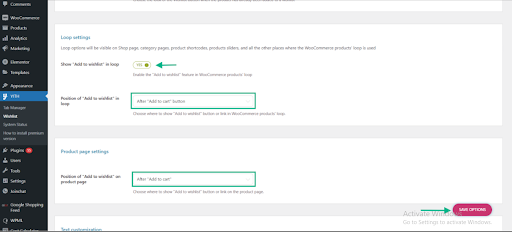
This will be appearing by default after, “Add to Cart”. From the menu of the dropdown, you can select a different position. You can position them next to “Add to Wishlist”.
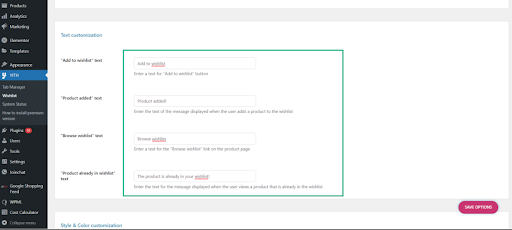
You need to scroll down to manage the design and color of the wishlist button.
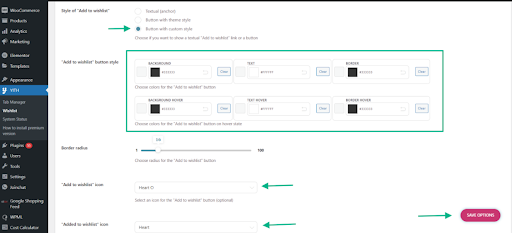
When done, tap “Save Options”. Head to the tab termed “Wishlist Page Options”.
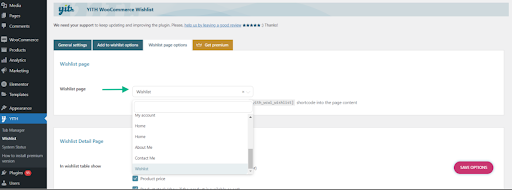
You will have a new wishlist page for the WooCommerce store. From the dropdown menu of the Wishlist page, you can choose a different page.
In the next step, you have to scroll and choose what information you want to display on the wishlist table.
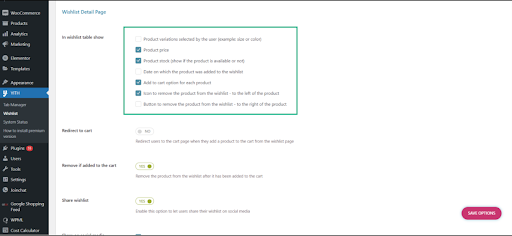
You can manage the possibilities to add wishlist to WooCommerce. For example, you can display the product variants and the items. You can even display the cost and many more.
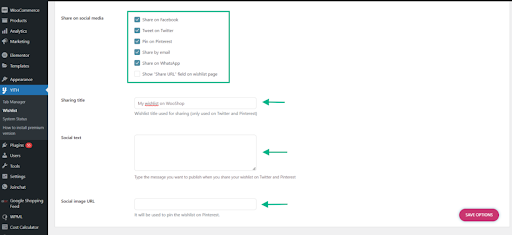
In addition, you get the freedom to add personalized wordings for social media. Giving the authority to the user to choose the social media platforms to publish their wishlist and much more.
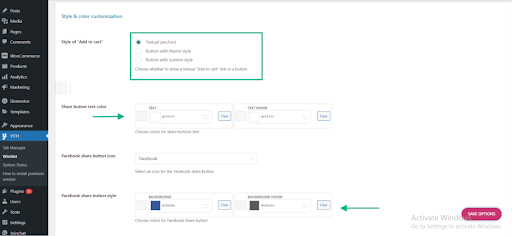
You also get to do the settings in the plugin. Hence, you can customize the color, text, and style of the sharing button for social networking channels.
Tap “Save Options” after you do the modification to the settings of the wishlist page.
Browse to your WooCommerce store to check the option “Add to Wishlist” displayed. This you will see under “Add to Cart” on the product page.
It’s done!!
Some alternatives of YITH WooCommerce Wishlist plugin alternatives to add Wishlist to WooCommerce
1. WishSuite
This is an easy-to-use and practical WooCommerce plugin. You can implement them in the most beautiful way on your WooCommerce website.
You can display the wishlist table anywhere on your business website. By employing the shortcodes, you can include the wishlist button on your business site.
The customers can delete their wishlist from the cart. They can even share their favorite items on various social networking channels. In addition, you get the customization option for designs, tables, buttons, etc.
2. APWW WooCommerce wishlist plugin
With this plugin, you can enable customers to add wishlist to WooCommerce. APWW WooCommerce wishlist plugin allows you the way the tables and wishlist buttons should appear.
Customers can recommend your eCommerce store to their friends easily. Through this plugin, they can share their list with their friends.

